Pages

BLOG SEARCH HERE

Showing posts with label Tips&Tricks. Show all posts

Tuesday, November 18, 2014

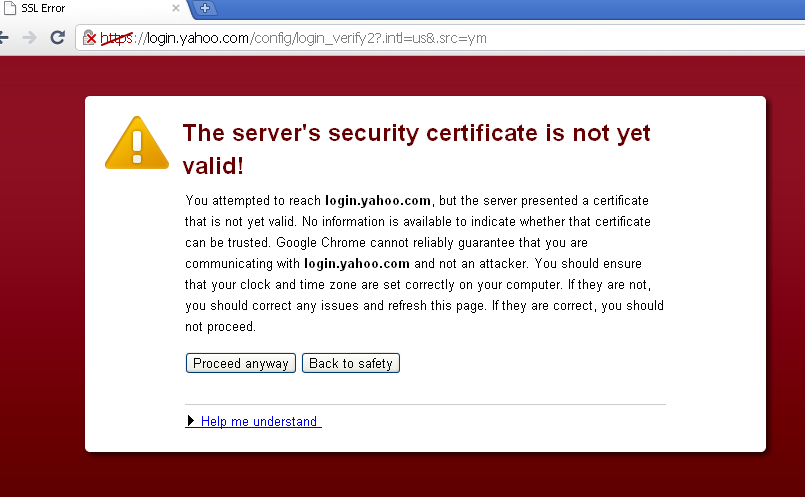
HOW TO SOLVE PROBLEM, SERVER SECURITY CERTIFICATE IS NOT YET VALID

 HOW TO SOLVE PROBLEM, SERVER SECURITY CERTIFICATE IS NOT YET VALID

Some time you install fresh Operating system in your computer and then you install Browser, google chrome. After installation you try to open gmail, yahoo, or facebook in
google chrome but you do not see your required page and see a message “Server Security Certificate is not yet valid”.  Then you also try to open the page by clicking on “continue anyway” but the result is same.

Useful Keyboard Shortcuts for Windows Computers-

 Useful Keyboard Shortcuts for Windows Computers

Useful Keyboard Shortcuts for Windows Computers

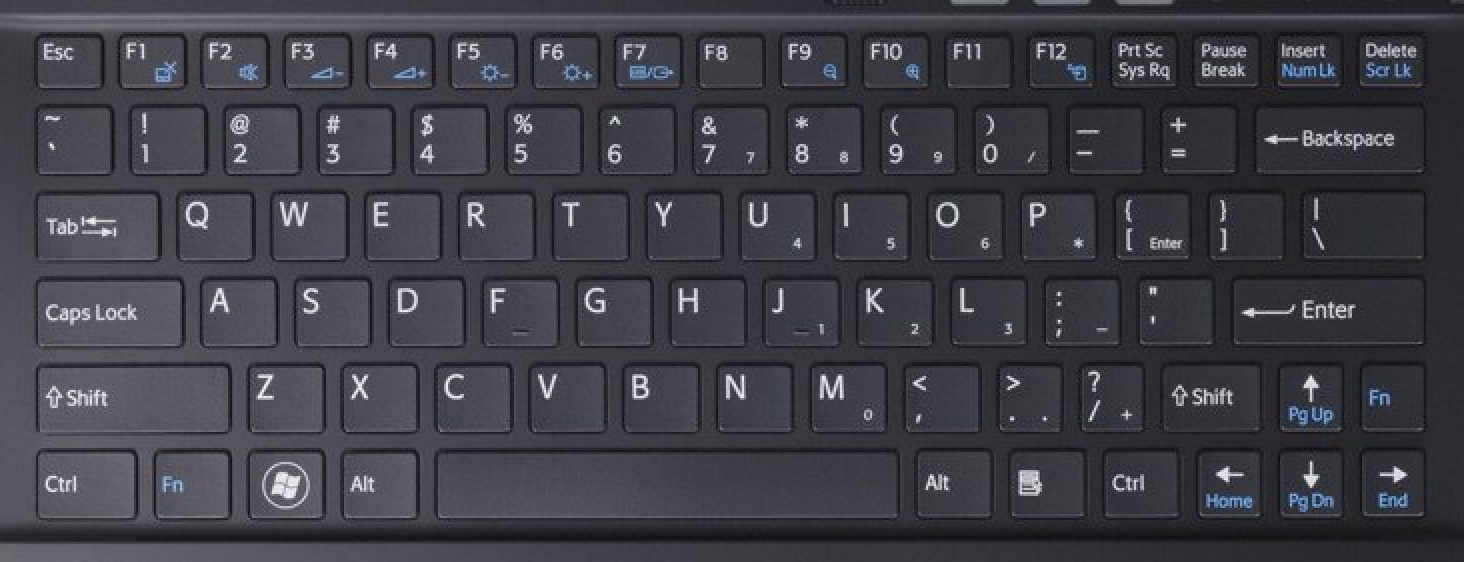
While most of us are already aware of obvious keyboard shortcuts like “Alt+F4” and “Ctrl+C”, there are some obscure shortcuts which most of us tend to overlook. These keyboard shortcuts are not only
useful for the average PC user but for advanced users as well. This article contains many such amazing keyboard shortcuts which if used properly could save a lot of time and effort. So let's get started.

Disable USB ports on Windows PC via Registry

 Disable USB ports on Windows PC via Registry
Disable USB ports on Windows PC via Registry


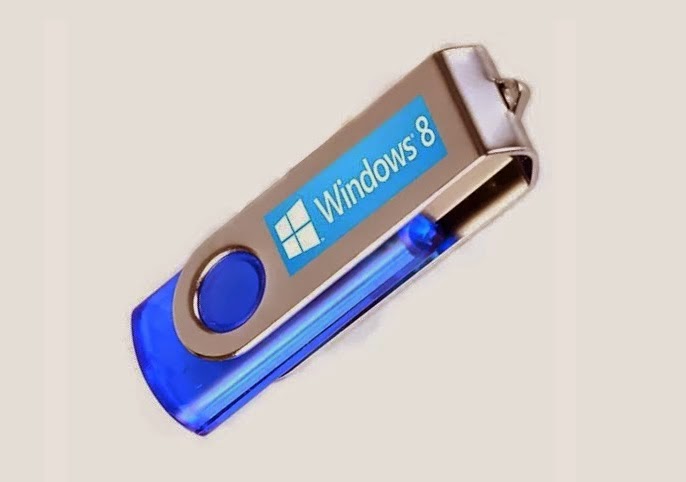
With this trick, you can disable access to your USB(Universal Serial Bus) ports on your Windows based PC to prevent people from taking out data without permission or spreading viruses through the use of USB (pen and flash) drives.

Thursday, November 6, 2014

how to block facebook games request or app requests

http://afctech2day.blogspot.com/2014/11/how-to-block-facebook-games-request-or.html#more

how to block facebook games request or app requests


It depends on how and where you log in your Facebook account. You might not see the "x" button if you're using mobile phone unless you will use any search engines like Google Chrome or Internet Explorer and log in to your Facebook account in a desktop mode. There you will see the "x" button to delete game requests. However, the way I understand the question by @Susan, she doesn't want to receive any game requests by anyone and I do have the same issue. What we (for sure) both like to happen exactly is to prevent anyone from sending us games requests and we don't want to delete and block each game request one by one or individually. In short, we want to automatically block/cancel games request.


I think that most of the answers here are correct and helpful and let me just clarify and simplify the answers as wee really cannot automatically block all games request so we wont see them anymore.

Answer # 1

1. Click the "Setting" button. (usually looks like a snowflakes or a gear on the top)
2. In the left side, look for "Blocking" button and click it.
3. It will then show you "Manage Blocking" page that has 5 sections listed below.
(Restricted List, Block users, Block apps invites, Block events invitations, Block apps)
(Focus only with "Block apps invites" and "Block apps")
4. In the "Block apps invites" section, type the name of your friend who always send you games requests then hit enter and Facebook will prevent that person sending you games request.
(You're still friends with that person as you only prevent him/her from sending you request)
5. In the "Block apps" section, type the name of the App you want to be blocked so no one could send you a game request for that particular game.

Answer # 2

1. Go to the homepage by clicking "Home" button found on top of the page.
2. Look for the word "App" found in the left side of your screen.
3. Click "Games" that has a letter F logo on a cube-like box.
(You will then be redirected to a new page that says "Apps Center")

(or)

type in the search box "app center" then click on the "activity" option then go to point no 4
4. In the left side of the "Apps Center" page, scroll down then click "Requests" button.
5. In the middle or center part of the page, all games requests will show up.
6. In each game request, you have 2 options to select/click. "Play Now" and/or "X" buttons.

--> Each game request is boxed/classified by whoever send it to you.
--> Multiple names might show up per game request whoever send you a game request
--> Example: "friend A, friend B and friend c invited you to try Criminal Case.

7. Click the "x" button to cancel/block the game request and it will give you a message and 2 options to select from then click whichever you want to. (See example below)

"You hid 27 requests for Criminal Case"
Block Criminal Case?
Ignore all requests from Friend A?

--> When you block the game, no one will be able to send you a game request for that particular game.
--> When you ignore all request from a particular friend who send it to you, other friend of yours can still send you game request for that particular game and the game is not yet blocked. Also, when you ignore requests from particular friends, you're not blocking your friends.

8. Repeat step number 6 and 7 for the rest of the games.

These 2 answers are very common and these are the only way to solve our problem regarding games requests unless you deactivate your account.

VISIT AGAIN 4 FREE SOFTWARES,GAMES,WALL PAPERS AND MANY MORE…….


PLEASE LEAVE A COMMENT BEFORE U LEAVE

Friday, October 31, 2014

How To Make Bootable Windows 7/8 USB Pen Drive

Make Windows 7/8 Bootable USB Pen Drive

 How To Make Bootable Windows 7/8 USB Pen Drive


Making bootable USB Pen Drive using Windows 7 USB /DVD Download Tool or command prompt is very easy. If you don't have CD/DVD drive on your computer and you need to boot any software or install Windows on your PC then now its very easy. And yes, boot from USB drive is much more faster then CD/DVD drive.
So now if you want to make bootable Windows pen drive. Then follow the steps given below:
Method 1


Steps:
1. To work with Windows 7 USB /DVD Download Tool you need an ISO image of Windows 7/8.
2. If you don't have ISO image then create it using Nero or any other burning tool. Insert the disc in your DVD Rom. Launch Nero. Make a copy of Windows Disc and save it as an ISO image.
3. Now download Windows 7 USB /DVD Download Tool from official site of Microsoft or Click Here. This is a free tool provided by Microsoft.
4. Launch Windows 7 USB/DVD Tool. Click on Browse.
Windows 7 USB /DVD Download Tool

5. Browse for the ISO image. Select the image file and click open.
Windows 7 USB /DVD Download Tool

6. Click Next.
Windows 7 USB /DVD Download Tool

7. Now in step 2 click 'USB Device' to make your USB Device bootable.
Windows 7 USB /DVD Download Tool

8. Now in step 3 click on 'Begin Copying' to start the process.
Windows 7 USB /DVD Download Tool

9. Within a few moment your USB Device will be bootable. After completion close the window.
10. Now boot from your pen drive and continue Windows installation.

Windows 7 USB/DVD Tool "Not Valid ISO" Error:

While adding ISO image in first step you may get an error message like "Not Valid ISO File".
Windows 7 USB /DVD Download Tool Error

If so then you can simply fix the problem with Power ISO with some easy steps.

Steps:
1. Download 'Power ISO' and free keygen or crack from internet.
2. Now install and run Power ISO and register.
Power ISO

3. Open your Windows 7/8 ISO image with Power ISO. 
PowerISO

4. Click on File then 'Image properties'. 
PowerISO

5. Now in 'CD/DVD File System' section click all the options(as shown in picture) and click ok.
PowerISO CD/DVD File System

6. Now in file option save the image.
PowerISO

7. Now click 'Yes' to overwrite the file. Within a few moment file will be saved.
PowerISO
PowerISO

8. Now browse for the image file and select the image file and your error will be fixed.


   Method 2

This method is using command promt.

Steps:
1. Run command promt as Administrator.(Right click on cmd click on 'Run as Administrator').
Run command promt as Administrator

2. Type 'DISKPART' in command prompt. Now type “list disk” to see all of your connected disk
drives.
Command Prompt DISKPART Utility

3. Type this following command one by one.(Here Disk 1 is the disk number of my flash drive. So make sure Disk 1 is your flash drive disk number. If not then replace ''Disk 1" with proper disk number)
1. 'select disk 1'
2. 'clean'
3. 'create partition primary'
4. 'select partition 1'
5. 'active'
6. 'format fs=NTFS QUICK'
7. 'assign'
8. 'exit'
Command Prompt DISKPART Utility

4. You'll be exited from DISKPART utility. Now use bootsect utility to make your flash drive bootable. To do so, insert the Windows 7/8 DVD in DVD drive. For this tutorial, the DVD drive is J: and the USB drive is I: (Replace this drive letter with proper drive letter of your PC)
Now type the following command in command promt one by one.
1. J:
2. cd J:\boot
3. BOOTSECT.EXE/NT60 I:
Command Prompt DISKPART Utility

Your USB drive now has been update with BOOTMGR compatible code. Now close the Command Prompt windows.
5. Now open your Windows 7/8 DVD drive and copy all files in your Flash Drive.
Copy Files

6. Everything is done. Now boot from your pen drive and continue Windows installation.
 Method3

Sunday, October 26, 2014

Keyboard Shortcuts


Keyboard Shortcuts

Copy only active window to clipboard Normally, the Print Screen key copies the entire display (or two displays if you got them), ALT + Print Screen only copies the currently active window to the clipboard. Whether taking a screenshot to diagnose a problem, or just because you want to show something to a friend, this will come in handy.
Fix those little mistakes Did you know you can undo almost any action? CTRL + Z is the ultimate hot key, and for sure you knew about it already, however note that undo doesn’t just apply to typing. If you accidentally delete or move a file, you can hit CTRL + Z to bring it right back to where it was. In Chrome and Firefox you can also undo closing a tab using CTRL + SHIFT + T.


Cycle through open windows Pressing ALT+TAB allows you to cycle through currently open windows. This makes switching back and forth between running processes quick and painless. If you want a more stylish method of cycling through open programs, Windows + TAB will do the job for you.
Interrupt all processes CTRL + ALT + Delete is one of the most common PC shortcuts, and one almost everyone is familiar with. The important thing to note is that it interrupts all processes, including the one that is bogging down your system, which can mean the difference between needing to restart or not.
Close the current program Typing ALT + F4 will close the program that is running. This is useful as it saves you time mousing over the "X" and clicking. People will often use this as a joke, telling you to press ALT + F4 to fix a problem. Don’t fall for it unless you want to close what you are doing.
Minimize all windows Sometimes you have a bunch of stuff running, and you want it all to go away so you can get to the desktop. Simply pressing Windows + D will minimize everything you have up, which will save you some time pressing the minimize button for each window. It should be noted that Windows + M offers similar functionality, but there is no undoing, so Windows + D is the more favorable approach.
Open the task manager directly If you want to bypass the interrupt that happens when pressing CTRL + ALT + DEL and jump right to the task manager, typing CTRL + Shift + ESC launches it directly.
Close the current window/tab Stick of moving all the way to that X button? Press CTRL + W and the current window will close. (Don’t do it now, or you will miss the rest of the tricks!)
Bring up the system information window This is so much quicker than digging this out the traditional way... Just press Windows + Pause/Break and the System Information panel will be ready to go. This might be the only use for the Pause/Break key you will ever find, so enjoy it!
Better multiple monitor control There are several useful keyboard shortcuts for controlling open windows on multiple monitors. Pressing the Windows Key + Arrow Keys will cause a window to quickly snap to each side of either monitor. Alternatively, hitting Shift + Windows Key + Arrows will cause the window to jump to the other monitor. Lastly, pressing Windows + P will allow you to quickly set up a second display or projector.

Web Browsing Tricks

Automatically add www. and .com to a URL You can shave off a couple of seconds typing in a URL by simply click CTRL + Enter after you type the name of the site. Need .net instead of .com, press CTRL + Shift + Enter instead.

Jump to address bar There are a number of ways to jump right to the address bar from anywhere in browser. Pressing CTRL + L, F6, and ALT + D all accomplish this goal.
Bring back a closed tab We covered this already, but it's super useful. Accidentally closed a tab? Simply press CTRL + Shift + T to reopen the most recently closed tab and get back to what you were doing.
Use private browsing The uses for not having cookies and history saved are obvious for certain activities, you know, like shopping for gifts on a shared computer (of course!). Pressing CTRL + Shift + N will launch a new private in Chrome, CTRL + Shift + P will do it in Firefox and Internet Explorer.
Cycle through open tabs Pressing CTRL + TAB while in a browser will flip between each one. This can be much faster than moving the mouse and clicking on a tab. CTRL + NUM (1, 2, 3, 4, n..) will also take you to certain tab in that numeric order.

File Management Tricks

Rename a file quickly Right-clicking and selecting rename is not very efficient. Instead, simply press F2 while a file is selected to change its name. To alter the name of another file, type TAB without deselecting the current file.
Rename files sequentially in Windows You actually don’t need to download any programs to perform a batch file rename in Windows. Instead, you can select all the files you want to change, right-click the first one in the list, select rename (or use F2), and type in the name. This will automatically change all the other files with the same root name with a suffix: (1), (2), and so on.

Select multiple files using the keyboard To select a bunch of files using your keyboard, you can press Shift + down arrow to select a single file or Shift + Page Down to select a large group of files at one time.

Security Tips

Run programs on an infected PC Often times, malware will prevent a computer from running certain programs. Changing the name of the .exe file can often override this. If that doesn’t work, changing the extension to .com is another useful alternative, and the program will still be able to run in spite of the extension change.
Read installers Even major programs can install toolbars and other unwanted pieces of software during installation. Take a few seconds to read each step to make sure you are not agreeing to install something other than the program you were actually seeking. Far too often people just push next over and over, and end up with a browser covered in various search bars that just aren't needed. In the worst of scenarios, these can have nefarious intentions.
Lock your computer if you get up Sick of your "friends" going onto your computer at work or home and posting things on your Facebook/Twitter page on your behalf? It’s certainly an annoyance, but an easy one to prevent. Windows + L will lock your system right away, requiring a password (if you've set one) to log in again.

Program-Specific Tricks

Photoshop: Drag the marquee without losing the ability to size it The marquee tool is, at its most basic level, designed for selecting a part of an image. It’s used constantly in Photoshop, and there is a handy trick many users miss. While dragging it around, you can press space, which will allow you to size it while moving it. This saves time by letting your perform two key functions at the same time.
Steam: Move games to another drive or partition By default, Steam installs all games to the same HDD or partition, but what happens if that fills up? The solution: download Steamtool Library Manager. It makes it easy to move games to another hard drive without messing with the functionality of Steam.
VLC: Fix unsynced audio and subtitles In the popular media player VLC, if your audio loses sync with the video or subtitles, there is an easy way to fix this. Simply pressing J or K will move the audio forward or backwards. Similarly, to sync the subtitles you can press H or G.
The combination of using these tips and tricks on a daily basis will most certainly make your computer life much more enjoyable, or at least more practical. And so, did you learn a thing or two that you didn't know before?

PAGE NO.

WELCOME TO GOOGLESOFT2DAY.BLOGSPOT.COM FOR FREE AND FULL VERSION REGISTED SOFTWARE'S,GAMES,WALLPAPER'S DESKTOP THEMES AND MANY MORE FOR FREE PLEASE HIT LIKE MY FB PAGE AND COMMENT THANK U…